Starting with the cockpit
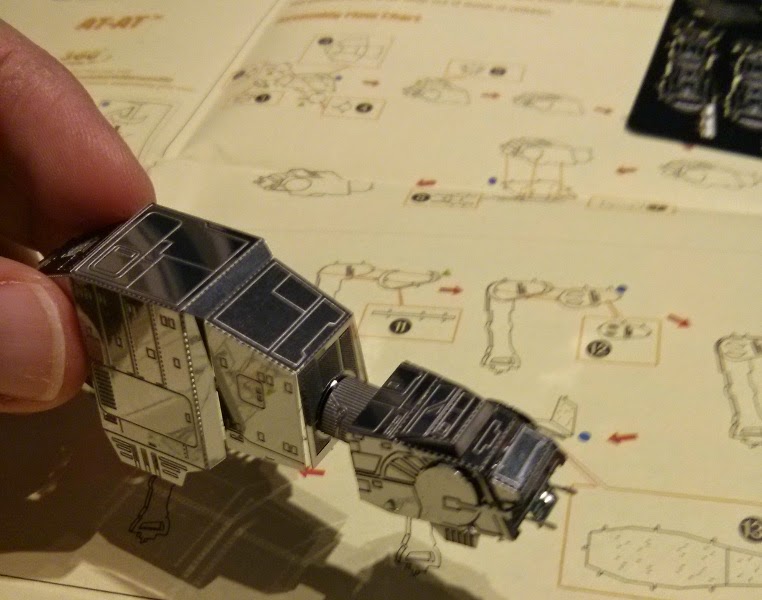
I started building the walker just the way the instructions told me to: from the head. First I bent the general shape in and then attached the thing I'm going to call the window frame into the faceplate. After that (pic #3) I attached the chin guns and the wedge-shaped piece on top of the head.
Connecting the head to the torse was done with a neck tube. You can't see it in the photos, but after bending and rebending the head's parts this way and that way the rearmost one broke off (as I hadn't yet figured out how to build this sort of a thing the most efficient way) and I superglued it into place later on. So I learned that I shouldn't bend anything before I absolutely had to, as these thin and often perforated finely cut pieces have to be manipulated a lot. That's bad business, as anyone I assume to know.
Now that all the more visible was done, I attached the chin guns on to the head's baseplate and then the baseplate in to the head. Of course the instructions had markings whether to just bend the attachment lips or to twist them around, depending on the place and part. I decided to follow my own lead, depending on how much sense the instructions made.
To satisfy my own curiosity I took a shortcut and bent the torso part in form and attached the neck on that one. That also helped me to support the broken neck while the superglue cured and the head was set into a good position.
Some leg work
The legs consisted of surprisingly many parts. First there was the "inner thigh" part, where I was to attach a thin strip bent into a double-rolled fishing hook -shaped slip to bring the thickness of the hip joint. On top of that (towards the center of gravity) the opposing plate of the topmost leg/hip part. Then this setup was completed with the outer side of the leg and the thickness was provided by bending the numerous flaps from both leg parts. Sounds much more complicated than what it was.
As expected, the first leg was a prototype and after that it was just doing the same thing three more times. All this had taken about an hour, I think, in one sitting. I had prepared mentally to swear like a drunk pirate, but so far it had been smooth sailing. That was worrysome.
Engines
For some reason the engine tubes (Wookieepedia says they're "
KDY FW62 compact fusion drive system") got their turn now that I already had the right-side legs connected into the belly plate. I think they'd been much easier to install first, but I guess someone else had a better idea.
Funnily all the other pieces were to be bent or rolled following the tiny shapes, except these jokers. They were rolled against the texture. I just used the handle of my x-acto knife to start the bend and then did the rest manually. Of course I never got the round parts bent round enough, but they were close enough, as the connector lips helped with the positioning..
The back hump
A couple of tiny pieces were to be inserted into the rear armour plate of the AT-AT, so I did that before diving to the nervousness-causing foot pads. Not that it made much of a difference, as both pieces were just bent a and plugged in.
Some paws
The left legs were done with the same routien. If my memory serves, I spent about 20 minutes with them, the back and the motors. Still, I had to leave the paws for my third and final session.
I didn't think of taking a photo of it, but I'll confess that I built the first foot like an idiot. Firstly I started from the toes when I should've started with the ankle tube. Secondly I went and attached the ankle tube 90 degrees wrong, so I couldn't insert the walker's leg. So I had to untwist the connectors somehow, get the tube out, rotate it and reinsert it and retwist the connectors without ruining anything. Luckily I managed with that with good results.
Once again: when I had practiced with one, the rest went with ease. My All-Terrain Assault Transport was standing proudly on its feet, just like the Kuat Engineers had designed. What remained was inserting the belly plate into the torso. And yet again: I should've followed the instructions and gotten away a bit more easily than now. I guess I'll never learn, no matter how much I mumble about this same topic :)
A completed warmachine
I took a couple of posing pics when I was done. A couple of them were moved and the rest are what they are.
This one got done so quickly, that I didn't see a point in dividing the construction and wrap-up phases into separate posts. And brings a bit of a change in this silly blog of mine!