Mastodon

26.3.14

Waiting for the paint to dry again

Last evening I quickly cut some lengths of masking tape to protect the surroundings of those places I had inteded to repaint. Apparently it was only to be done on the left side of the model. If my (horrible) memory serves me correctly, that's where I started painting so I guess it explains a lot.


More greenery means that the spring's coming

As a super surprise move I took the badger in my hand in the afternoon already and did all I could to fix my earlier mistakes. While I was doing that I also painted the gun pods green (they could've been dark grey but looking at the pattern, green suits it better). Then I airbrushed the propeller pieces that were still in the sprue. Those I'll fix up when everything else's out of the way.


That's it?

Almost. There are undoubtedly some small (I hope) pieces that I have to manually fix. The last fortress of paintlessness is the cockpit canopy. And I still haven't found the missing piece!

Now I just have to wait for the paint to dry. I guess that I'll leave it for tomorrow, just in case...

24.3.14

Otherwise it's neat, but...

Just like I bragged last week, I applied the dark grey (VMA 71.056 Panzer Dk Grey) paint on the top surfaces of my plane the same evening and a light grey (VMA 71.103 Grey RLM 84) on the bottom surfaces. The next day I tore off my masks and alas!

A minor setback

The pattern was really good, I thought. I was really pleased.
But then I saw that the green (VMA 71.104 Green RLM62) that I had apparently painted a bit too light-handedly got partially torn off near the left wing's base. My guess is that some residue from the bad painter's tape I had had there before was left behind and that ruined it.

I briefly pondered on my options. Either I reapply masking tape here and there and apply another layer of green where needed or I try to make it look "worn through". For whatever reason the second idea doesn't appeal to me much, so I guess I'll go and airbrush a new layer of green to some places.

So the camo pattern may change a bit, in some places the faded green is a bit too faded. In some places it looks really good to me (more natural, I guess). Maybe that's why it would be a good idea to pick up the airbrush and fix up my mess.


At least the beast's belly wasn't troublesome at all. While I painted the bottom I also painted the gun pods with the same grey. When I mask the fixables, I'll mask off the main bodies of the guns so I can apply a green on their front-top subsections while fixing the rest of the plane.


19.3.14

Starting on the splintery camo pattern

Redo

The first thing I did was to tear off the (bad) masking tape I had applied the last time. Then I painted the tail, the hull and parts of the wings with green so widely that all and more that I wanted to be green was green. After this one dried properly, it was easy to pick up the lines-to-be for the camo pattern I intended to have on my Kanonenvogel.


Going on with the tape-mess

Last evening I spent about half an hour by attaching strips of masking tape here and there. Because my idea was that I'd paint accurately, not all the green surfaces needed to be totally blocked. Of course the tiniest green bits were covered to avoid accidental spillage.
If I got the colour #2 airbrushed on the top and side surfaces today, I'd be quite content. After that I'd do the light belly side and later on the decorations like country insignias and the yellow stripes.

13.3.14

Holding my breath

I have to admit that I had postponed and delayed with the painting part of my Stuka project this far. Why did I do that? Because I really wasn't sure if my new Badger would work just like that - plug and play -  with my current setup. To my great (and happy) suprise I found myself sorely mistaken. I didn't have to postpone it any longer, I didn't need to go and buy more crap to get my airbrush running.
So once again we found out that I was worried for nothing. Once again.

The first attempt

Of course using that device differs quite a lot from the old one and the result was obviously "I'm new to this"-like. Maybe I'll do better when I apply some real paint on it. My only excuse for a sucky priming job is that light gray plastic + light gray primer provides quite a bad contrast for someone equipped with as bad eyes as I do.
I trust that my plane's going to look decent at least, in the end.


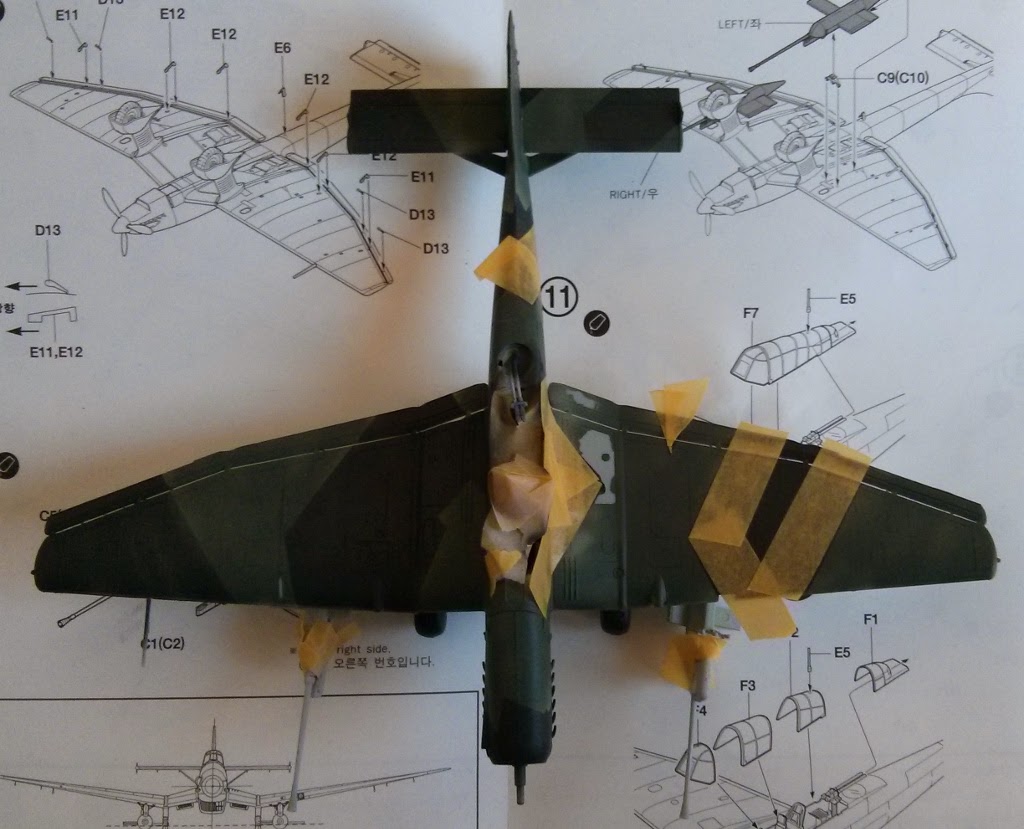
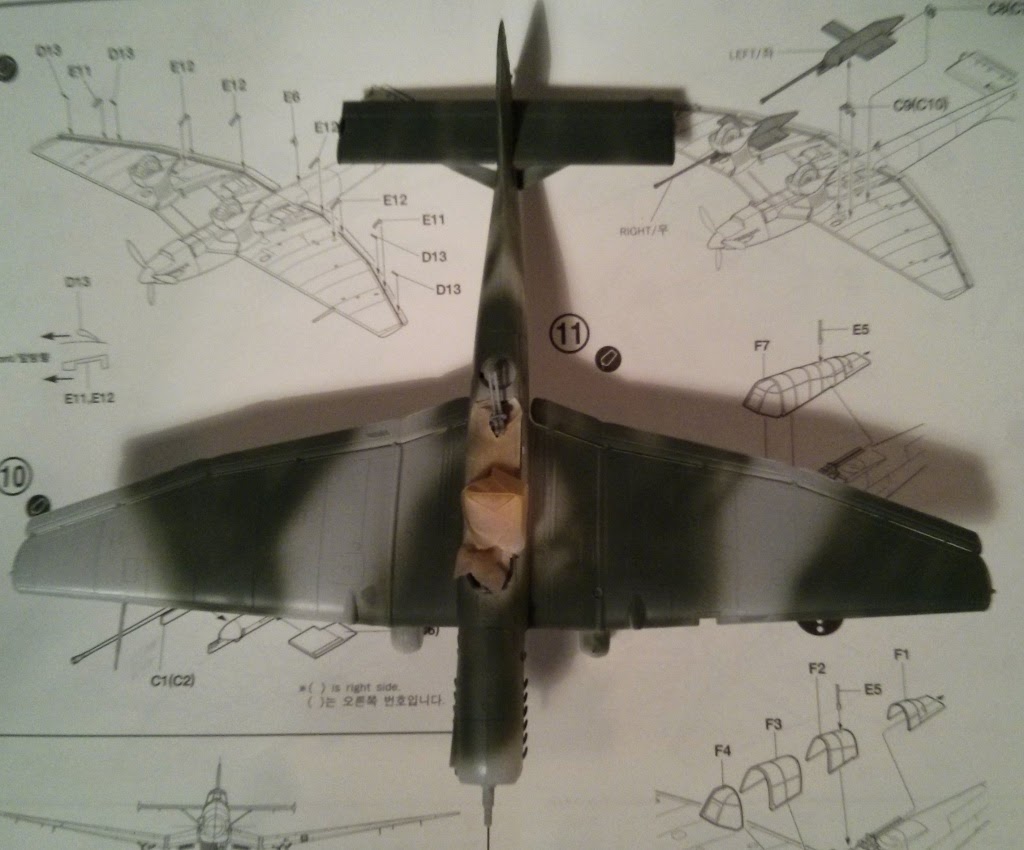
I started the masking for the camo already, as the photo shows. This time I wasn't going to first coat the whole model with one colour, apply a mask and then recoat the remaining surface area with another colour. I may end up approaching the paintjob a bit differently from this, though.

...errrrwhat?


Oh yes. The canopy. I had finished applying the self-cut masks on the last piece of the canopy and I was just attaching it for painting, when my fingers said sssslip! Then the foremost piece fell somewhere. Even today I've no clue where it ended, as despite my attempts to find it failed miserably.
Everybody knows the legendary carpet monster but my workspace has no carpets, the piece I lost wasn't a sub-millimetre photoetched piece but a damn chunk of the canopy! In the end I gave up my hopes of finding it anymore and moved on to the one-piece part.

5.3.14

Guns and tape

Bordkanone BK 3,7

There's not really much to say about the autocannon assembly, these six-piece units were so simple. Perhaps the most essential deviation from my previous plans was that I glued the pylons into the guns instead of following my earlier plan of gluing them onto the wings. I just thought that in case something goes wrong, it'd be easier to make the studs fit the wings instead of fighting the potentially offset pylons to where the attachment points are in the pods.


Masking tape chaos

Yesterday evening I finally sat down to work on the canopy pieces with some masking tape. After a bit less than 45 mins I had accomplished this much. Three pieces out of four, mostly as nice as they're going to get. There's some potential for fine-tuning still, but as I had feared this would take many painful hours, things have been rolling pretty well so far!


In case this masking doesn't hold or the result ends up sucking in other ways, I still have the one-piece closed canopy as a backup. Though, if I have to revert to it, I'll paint it by hand, for I don't have a third piece to fall back to if that fails as well. Anyway, I do trust that this ends up just fine and all this work on slicing down pieces of tape to one or to millimeter lengths hasn't been in vain.